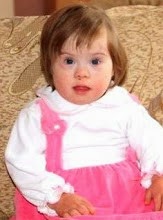
Alayna has been waking up at night since around the time I started chemo. It then becomes a domino effect as she wakes Dariya up and she has to bang her head to get back to sleep which is crazy loud. Jason and I live in pretty much a zombie, sleep deprived state all the time.
Over the past few months I have been researching weighted blankets and thought this might help the sleep problems in our home.
However, after researching and talking to others I quickly realized they are very expensive to buy, running around $100 for the size blanket I was looking into buying.
So I set out to make them.
I searched the internet for a pattern and found one at
Davidsblankets.com . It sounded a bit daunting as I don't really sew. Sure I had lessons when I was like ten but, truthfully I don't sew.
This pattern is only 8 steps.
Easy peasy! Really go check it out. If I can do it so can you!
I researched poly pellets and found out they are the extras from plastic companies. Well, what do you know we have a company that makes plastic cups a few miles from home and Jason happens to deliver to them. He inquired about extras and if they would sell them to us. The company gave us as many pellets as we need, for free! Yep, I will be making Dariya and Aidan each a blanket. You can buy the pellets at W*lmart, online or any fabric store, be sure to check for coupons at the fabric stores as you can get 40% on an item many times making the pellets very inexpensive. The good thing about pellets is you can wash and dry them.
Next, I hit W*lmart for their sale material and bought enough fabric to make both girls 40 x60 blankets for $13.50, fleece on one side, flannel on the other. Throw in a spool of thread for $2 and I was on my way home.
I followed the pattern completely besides the poly fil in step 7, I left it out as I find it to be too scratchy. Here is an overview (check the link for complete details).
First, I washed and ironed the fabric. Then put them right sides facing each other. I pinned around 3 sides and sewed a seam around the three sides. Turned it right sides out and sewed another seam. Steps 1 and 2.
Next I measured my width and divided by 6 (to form 6 equal columns). I marked the fabric with chalk and sewed along these lines. I then measured the height and divided by 6 to make equal squares. I marked the fabric so I had 36 equal squares.. Steps 3 &4
I wanted to make Alayna's blanket 6 pounds.
Recommended weight is 10% of body weight plus a pound. I did Alayna's a little heavier as I made the blanket much bigger than her so I knew all that weight wouldn't be on her.
I calculated the weight in ounces (6 *16 =96) then divided that by my 36 squares (96/36 = 2.66 oz per square)
I borrowed a digital kitchen scale from a sweet friend to do all the measuring accurately. I then poured the pellets into each column and sewed across my marked line so that my first squares were completely encased. I then repeated this process with next 5 rows. Steps 5-7
Finally I was finished filling and had to seal up the remaining side. I then made another seam all the way around the blanket (I don't really want 6 pounds of pellets falling out anytime soon ;)!
One word of caution: I broke one needle when it hit one of the pellets. Be very careful to get them out of the way of your machine.
After a few hours of work I had a finished product for only $8.75!
Now, I probably won't win any blue ribbons at the fair but, Alayna was thrilled with it.
Here's to hopefully more sleep coming our way.

Did you make a weighted blanket? Tell me your success story!